반응형
python 엑셀 자동화 [업무자동화]
xlsxwriter 와 pandas 를 활용한 엑셀 업무 자동화
pandas 설치
pip install pandas
import pandas as pd
import numpy as np

# Sample DataFrame
df = pd.DataFrame(np.random.randn(5, 4), columns=['one', 'two', 'three', 'four'],
                  index=['a', 'b', 'c', 'd', 'e'])

# Dump Pandas DataFrame to Excel sheet
writer = pd.ExcelWriter('myreport.xlsx', engine='xlsxwriter')
df.to_excel(writer, sheet_name='Sheet1', startrow=2)

# Get book and sheet objects for futher manipulation below
book = writer.book
sheet = writer.sheets['Sheet1']

# Title
bold = book.add_format({'bold': True, 'size': 24})
sheet.write('A1', 'My Report', bold)

# Color negative values in the DataFrame in red
format1 = book.add_format({'font_color': '#E93423'})
sheet.conditional_format('B4:E8', {'type': 'cell', 'criteria': '<=', 'value': 0, 'format': format1})

# Chart
chart = book.add_chart({'type': 'column'})
chart.add_series({'values': '=Sheet1!B4:B8', 'name': '=Sheet1!B3', 'categories': '=Sheet1!$A$4:$A$8'})
chart.add_series({'values': '=Sheet1!C4:C8', 'name': '=Sheet1!C3'})
chart.add_series({'values': '=Sheet1!D4:D8', 'name': '=Sheet1!D3'})
chart.add_series({'values': '=Sheet1!E4:E8', 'name': '=Sheet1!E3'})
sheet.insert_chart('A10', chart)

writer.save()

반응형
'IT > 인터넷 마케팅' 카테고리의 다른 글
| 샤오미 미밴드 5 최저가 링크 (10) | 2021.03.09 |
|---|---|
| 쿠팡 파트너스 아이디 AF2747484 (10) | 2021.03.09 |
| defold 한글 메뉴얼 (4) | 2020.12.17 |
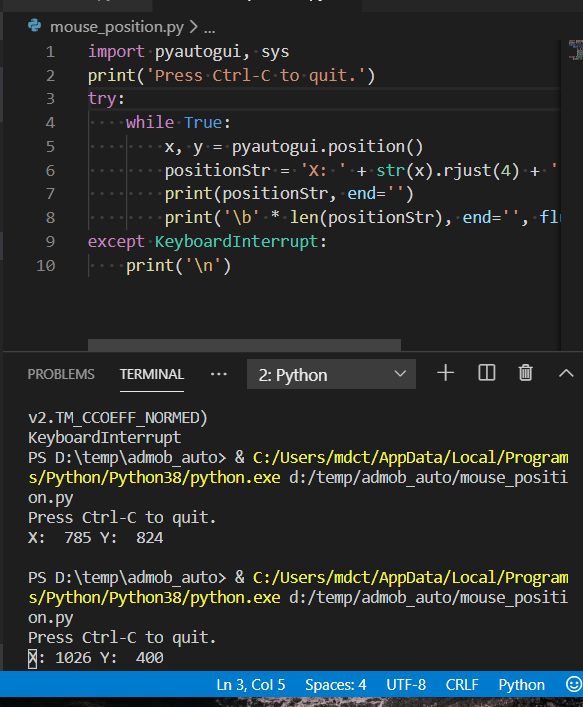
| python 마우스 실시간 위치 좌표로 표시 (6) | 2019.12.16 |
| python 특정 디렉토리 파일 이동 프로그램 (7) | 2012.01.10 |